
Problem#
Windows Subsystem for Linux (WSL) uses Hyper-V to virtualize Linux. This can cause problems because when WSL is installed, the default Windows install with become a VM on Hyper-V, with WSL being another VM. What this means is that any other Hypervisors that are installed on Windows will be nested and run in software virtualization mode. This means that any VMs running in another Hypervisor when WSL is installed will run very slow.
My solution to this was to create a ‘WSL-alike’. Since WSL is a VM running in Hyper-V on a default install, I figured I could create a VM on another hypervisor (in this case VirtualBox, since I’m most familiar with it) and have it act much the same as a WSL install. There may be features of WSL that are missing, but in my case, this is a great replacement that fits my use cases.
Steps#
Uninstall Hyper-V / WSL#
If you have WSL installed already, we will have to completely purge it to install our new VM. The reason for this is that when WSL is installed, the installation on your computer changes from a Windows install to a Hyper-V install. Then your Windows install and WSL both become VMs in this Hyper-V install. We must revert this in order gain the full potential of another Hypervisor running on windows (where we will run our WSL replacement).
To remove WSL and Hyper-V#
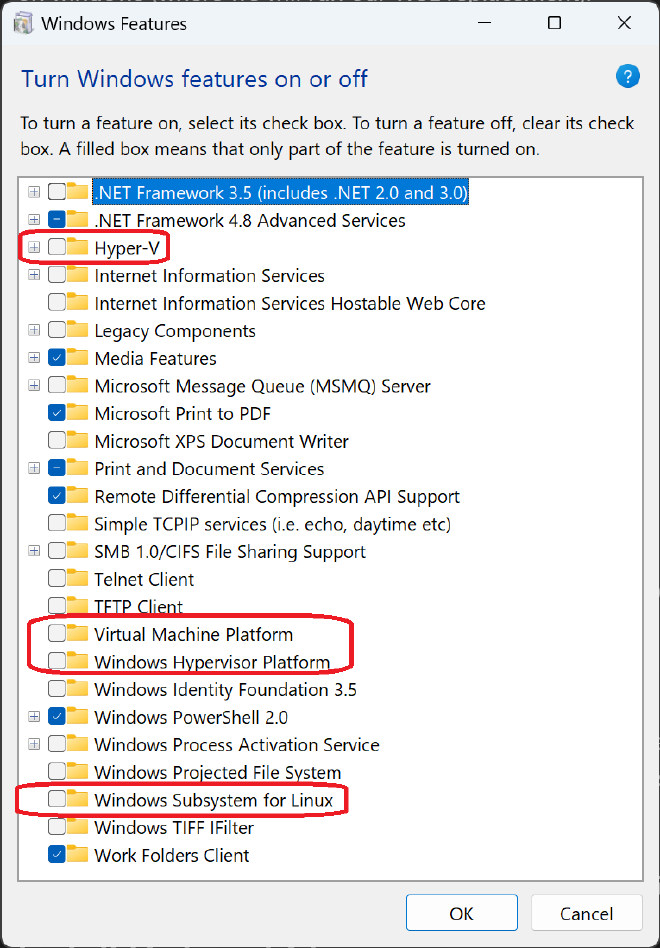
Windows Features disable
- Hyper-V
- Virtual Machine Platform
- Windows Subsystem for Linux
- Windows Hypervisor Platform
In Settings > Apps > Installed Apps
- Uninstall WSL Distro (usually Ubuntu)
- Uninstall Windows Subsystem for Linux WSLg Preview
Install Virtualbox#
Virtualbox can be installed from here: https://www.virtualbox.org/wiki/Downloads This is the program where we will run our WSL replacement VM.
Install VboxHeadlessTray#
https://www.toptensoftware.com/vboxheadlesstray/ This is a program that will put an icon in the System Tray where we can control the VM (for instance, if it crashes). It also starts the VM on boot and takes care of shutting it down on shutdown.
Install Distro of Choice#
Create a new VM with your distro of choice. In my case, I will be installing and using Ubuntu 22.04.
Network Adapter Setup#
The host will already come with an adapter that does NAT for internet access.
We need to add an adapter so that the host can reach the guest for SSH.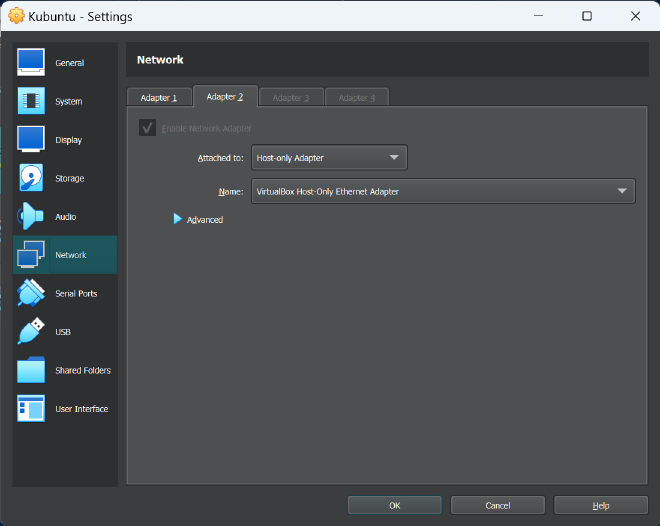
- [x] Enable Network Adapter
- Attached to: Host-only Adapter
Configure Host-Only networking settings#
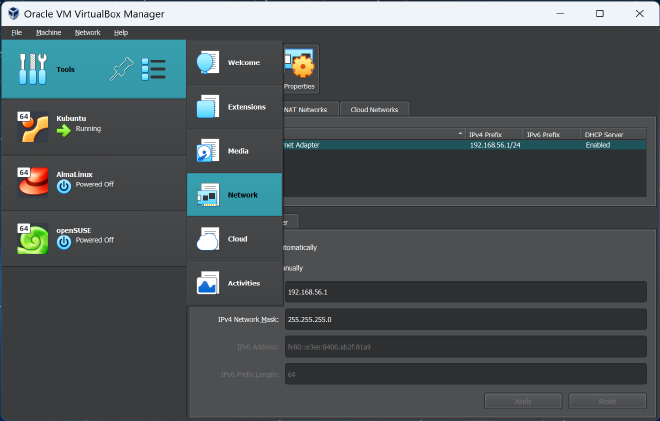
- Tools > Networks
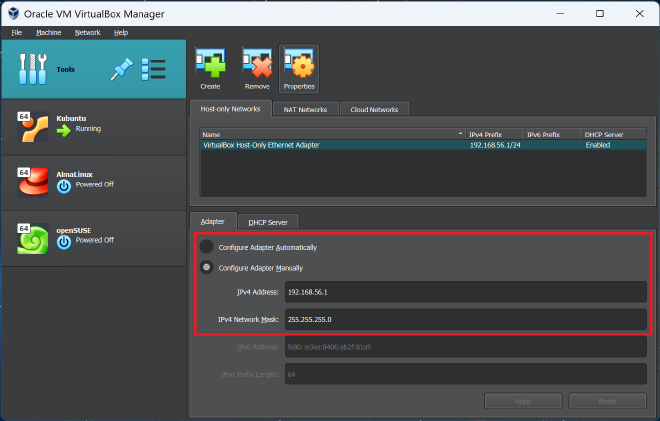
- Host-Only Networks
- [ ] Configure Adapter Automatically
- [x] Configure Adapter Manually
- Make note of the IPv4 Address in this section for [Setting up XForwarding](WSL with VirtualBox#Add DISPLAY variable in .profile “wikilink”)
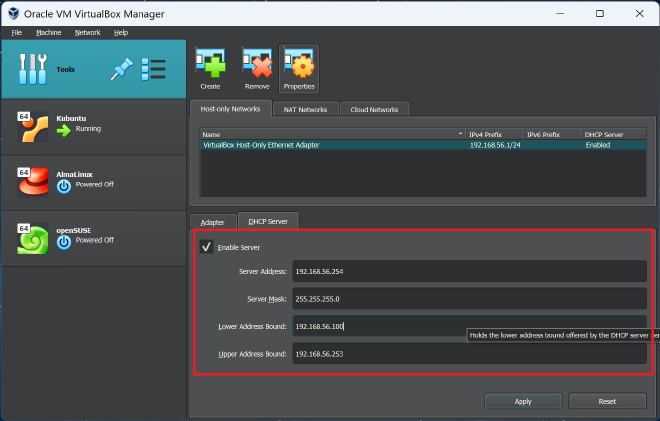
- DHCP Server
- [x] Enable
- Server Address:
x.x.x.254 - Mask:
255.255.255.0 - Lower Bound:
x.x.x.100 - Upper Bound:
x.x.x.253
Configuring the VM network#
Access the guest and we will configure the network as follows:
- The NAT adapter will use DHCP for configuration. (Should default to
10.0.2.15) - The Host-only adapter will get an IP from the DHCP server we enabled (should be
192.168.56.100) Change the Host-only adapter to a static IP (I recommend something easy to remember, such as192.168.56.10, then increment by 10 as you add VMs)
On Ubuntu, you can nano the netplan config file located in /etc/netplan (should follow convention of ##-<somename>.yaml)
Sample netplan config for Ubuntu:
network:
  version: 2
  renderer: networkd
  ethernets:
    enp0s3: # This may be different for you. Run 'ip a' and look for the interface name with the '192.168.56.XXX' IP.
     dhcp4: no
     addresses: [192.168.56.10/24]
     gateway4: 192.168.56.1
     nameservers:
       addresses: [8.8.8.8,8.8.4.4]
Then run $ sudo netplan apply.
Test the connection by running ssh <user>@<guest-ip>
If you see a prompt like <user>@<hostname>:~$, then your connection is good.
Set up Windows Terminal#
When WSL is installed, it automatically creates a profile in Window Terminal. This profile has access to the terminal of the Linux installation. We create our own profile for our install so that it acts much the same.
Copy SSH Key#
The first thing we will do is copy the SSH key from our Windows host to the VM authorized keys, so that we can SSH into it without having to type a password.
C:\> type $env:USERPROFILE\.ssh\id_rsa.pub \| ssh <guest-ip> "cat >> .ssh/authorized_keys"
> Note: This command is equivalent to ssh-copy-id on Linux
Change command in profile#
Next we will set up our profile in windows terminal.
At the end it will look something like: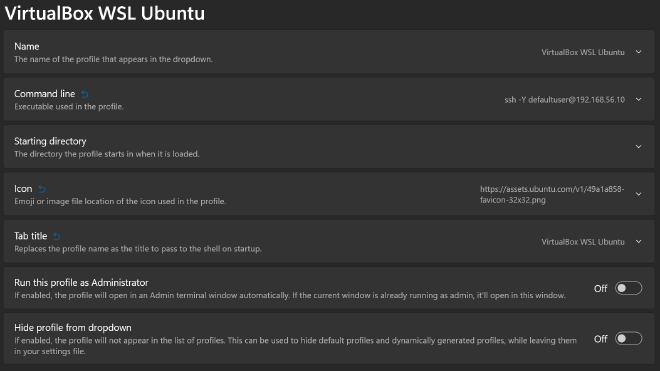
ssh -Y <user>@<guest-ip>. When you open a new tab, it will now automatically log you in.
Note:
-Yenables unrestricted XForwarding. If we want to have more security for one reason or another, use-Xinstead.
Disable Login screen (optional)#
When we open our guest tab, it shows a bunch of info about our install. To make it feel more like WSL, we can mute this feature to show just the terminal input. Run the following command
$ touch ~/.hushlogin
The login screen should now be disabled.
Set up SMB share for file access#
In WSL, the filesystem of the install can be accessed through the sidebar in Windows Explorer using Microsoft’s DrvFS storage driver. Unfortunately, DrvFS is proprietary, but we can emulate much of the functionality by creating a Samba share from the VM to the Host.
In my case, I wanted unrestricted access to the root filesystem, so I set up the root user as the smb user I will use to connect to the share.
Install samba server on guest#
$ sudo apt install samba
Edit /etc/samba/smb.conf#
Add the following block to the end of the file:
[share]
   path = /
   browseable = yes
   guest ok = no
   inherit owner = yes
   inherit permissions = yes
   writeable = yes
What everything means:
[share]- The name of the sharepath = /- Path to share. Set as root path so that we have access to the full filesystembrowsable = yes- Let’s network users see share (useful for debugging)guest ok = no- Do not let guest users connectinherit owner = yes \ inherit permissions = yes- Any files created/copied will inherit their owner/permissions from the folder it is created in- I did not have this configured initially. I kept running into problems where I would have to change file/folder permissions from root to the default user manually every time I copied a file from windows to the VM.
writeable = yes- makes share writeable, same asread only = no
Add new SMB user#
In my case I will be using root.
$ sudo smbpasswd -a root
# Enter new smb password
$ sudo smbpasswd -e root
Restart Smbd#
Restart the service for changes to take effect.
$ sudo systemctl restart smbd
Test configuration#
Open Windows Explorer
Type \\localhost\share in the Navigation Bar
Enter SMB creds (root and smb password)
If all goes well, you should be able to log in
Setting up XForwarding#
We can use GUI programs on our Linux install by using XForwarding through SSH.
Host Setup (Windows)#
Download and Install Xming on host#
We will be using Xming and VcXsrv as our X server on our host computer. http://www.straightrunning.com/XmingNotes/
Enable Xming on start with Task Scheduler#
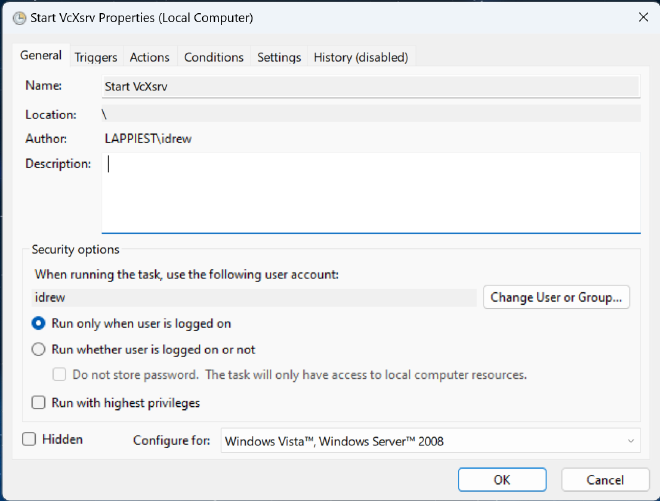
- [x] Run only when user is logged on
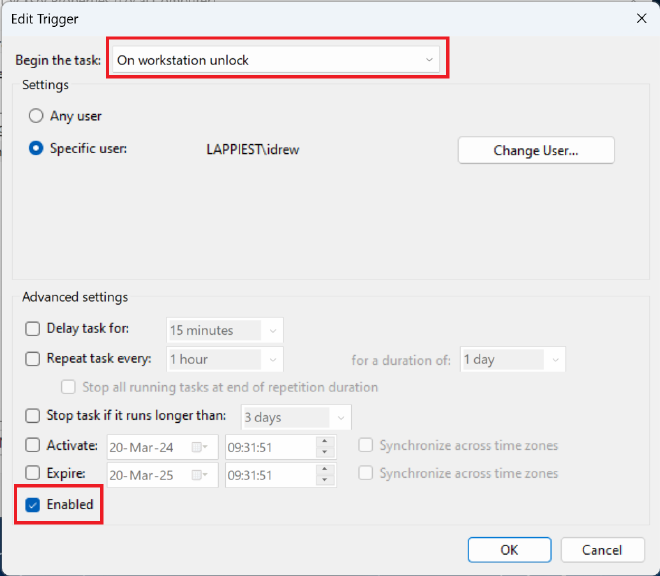
- Begin the task: On workstation unlock
- [x] Enabled
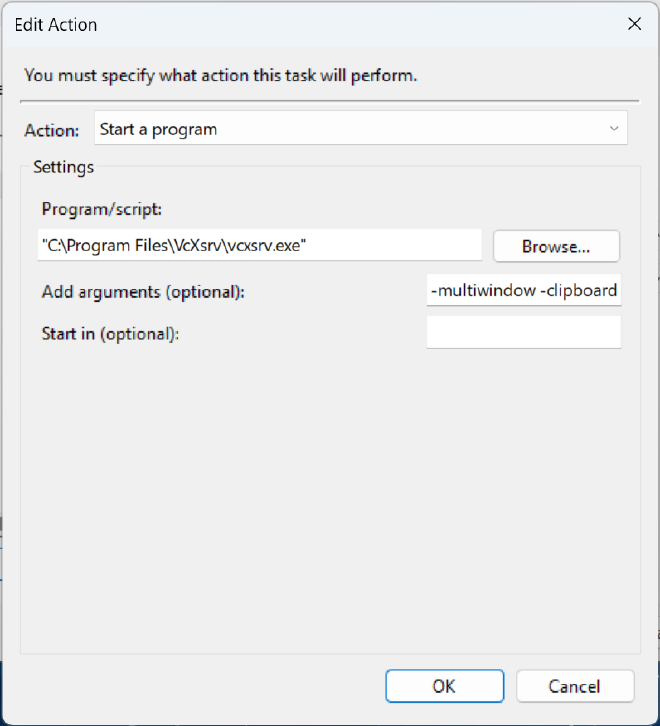
Start a program
Program/script: "C:\Program Files\VcXsrv\vcxsrv.exe"
Add arguments (optional): -multiwindow -clipboard -wgl -ac
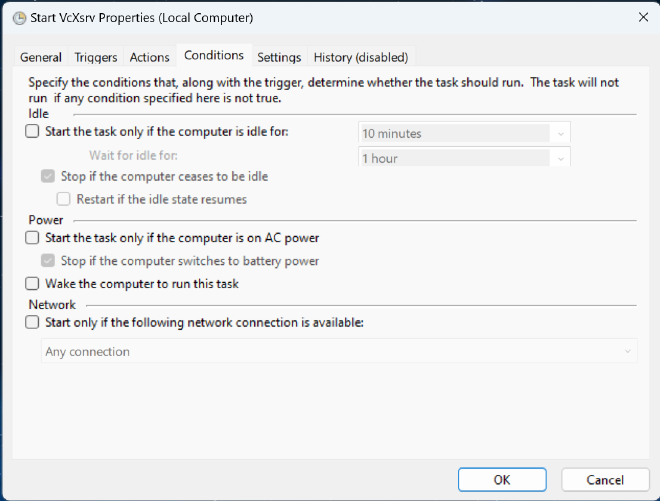
- [ ]
Start the task only if the computer is on AC power
Guest Setup (Linux)#
Add DISPLAY variable in .profile#
nano ~/.profile
Add the following line to the bottom of the file
export DISPLAY=<hostip>:0.0
> Note: Get hostip from [Configure Adapter Manually](Blog/Posts/WSL with VirtualBox#Configure Host-Only networking settings “wikilink”) under IPv4 Address
Create/Edit sshd_config#
touch ~/.ssh/sshd_config
nano ~/.ssh/sshd_config
Add the following lines:
X11Forwarding yes
X11UseForwarding yes
Test#
Open the Windows Terminal profile, and run xeyes. A window should pop up with eyes that follow your mouse. This means everything is working properly. You can now install any Linux GUI program you wish, and it will show up on your windows desktop when you run it.
Miscellaneous#
Working out the kinks#
Accessing Windows host from Linux Guest#
One feature of WSL I haven’t been able to replicate is being able to access the Windows host filesystem from the Linux guest. I have not found a good way to do this. I tried using an SMB share from windows, but the Linux guest can’t find it. I may have to alter the windows firewall rules to make this work, and that is a beast I do not want to disturb yet.
Running programs with a shortcut#
One of the things I wanted to accomplish with this project was a way to have a shortcut in my start menu that opened a native Linux program. I was unable to find a satisfactory way of doing this.

